 Being able to sew buttons on is a simple skill that everyone probably should know how to do. How many times have we been getting ready for a meeting or an appointment (or other important event) and had a strategically placed button pop off? If you’ve never had this happen, I applaud you – but this doesn’t make you immune to future possibilities! Also, being able to sew buttons on means you’re one step closer to sewing your own clothes, decorative items, crafts; basically, buttons have many uses. Despite the great looking little devices that have been invented to help people attach buttons without knowing how to sew, I still hold to the belief that they will never replace a well-sewn on button. So, let’s proceed:
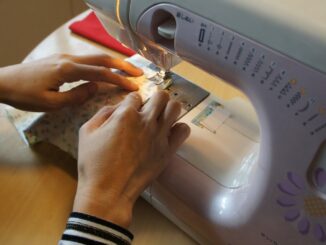
First of all, you need to mark the exact spot where the button needs to go. I prefer to lay the buttonhole (assuming it’s going to be going through one) over the area where the button belongs. I slip a pin through the buttonhole to the exact spot where the button belongs. Then I either mark the pin’s position, or leave the pin there until the button’s attached, to ensure it is going to the right location. Now I thread my needle and leave the thread doubled. This is important: If you don’t leave the thread doubled, then it means you have to go through the buttonhole that many more times in order to make sure that it is secure. If you keep the thread doubled, then the button will be secured faster. You can go through each set of holes about 3 times with doubled thread and be assured it is secure enough. So, keep the thread doubled, and knot it at the end to keep the ends together.
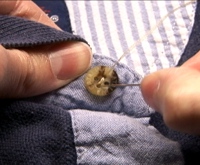
Start your thread on the underside of the fabric (where it won’t be seen) and secure it to the fabric with two knots. This will keep the thread from slipping out while you sew the button on. If your button has four holes, you can sew through it with a diagonal stitch or parallel stitches. It’s your choice. If you’re replacing a button and there are still others attached, look at how they were stitched on and copy that. Now you’ll just sew through each set of holes three times. Knot your thread again on the backside of the fabric. I also sometimes put a dab of Fray Check on the backside where the stitching is, just to secure the threads a little more. This isn’t required, but will help prevent future raveling of the thread.
Some people prefer to learn by example. If this describes you, feel free to watch the video tutorial below!