 Sewing by hand is a skill that most, if not all, people should probably attempt to master at some point. I know it might sound a bit opinionated to say so, but the reason I believe it so strongly is that at some point in your life, you’re going to discover that a button has popped off, or a seam has ripped on a shirt or pair of pants that you just do not want to part with, or some other comparative situation that makes you wish you could just fix it quickly. You can fix these items with a simple repair kit!
Also, if you’re learning to sew, this is a great place to start. Learning the straight stitch and the whip stitch opens up so many possibilities for future projects and repairs. So without further ado, let us proceed:
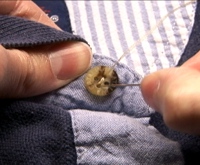
Knot your thread to the fabric
To sew anything by hand, you will normally begin by knotting the thread to your fabric.
- You can do this by making a slip knot, running the thread through a small section of the fabric, and then slip the needle through the slip knot hole, pull everything tight. Your thread should now be fastened.
- Another way to knot your fabric is to slip the needle into the fabric to create a loop, and then slip the needle through the loop. Pull the loop tight, and repeat to make a second knot.
- You can also tie off using the video instructions at the bottom of this page.
Sewing The Straight Stitch By Hand
The straight stitch is pretty well described by its name. It’s well used for very simple hems, sewing two pieces of fabric together, and gathering fabric. The modern sewing machine basically has mechanized the straight stitch, but sometimes there is just no replacing a straight stitch that has been done by hand. Prep your fabric, if needed, by ironing it flat or pinning it to hold it together. You will need to determine if these steps are appropriate before you begin to stitch. Knot your thread to the fabric, and then simply weave the needle in and out of the fabric in a straight line. The length of your stitches can be very short or very long, depending on what you are working on, again you will need to decide what is appropriate.. If you are gathering your fabric together, you might want to run a second straight stitch next to the first for stability.
Below is a quick video demonstrating the straight stitch:
Sewing A Whip Stitch By Hand
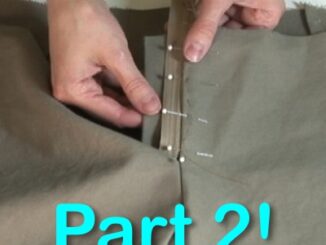
Now, the whip stitch is one of my favorite stitches to do. It is also pretty quick, like the straight stitch, but it is invisible when you do it from the wrong side of the fabric. You can also whip stitch on the right side, for decorative purposes. Most often the whip stitch is used to close a hem. So, before you begin you will want to have your fabric pinned the way you want it to be sewn; that is, if you’re hemming a pair of pants for example, have the fabric already folded, ironed and pinned in the configuration you want it sewn in.
Here is a video example of the whip stitch:
How to Tie Off
You can tie off your sewing thread by creating a loop. Pull your thread through the loop, and grasp the thread just behind the needle after it’s through the loop, and pull to tighten the loop. This leaves a second loop with which to thread through again. Pull your thread through that second loop and tighten the knot. Cut the thread.
Here is a video example showing how to tie off your thread: