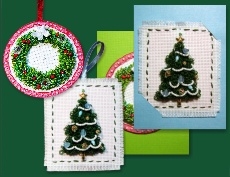
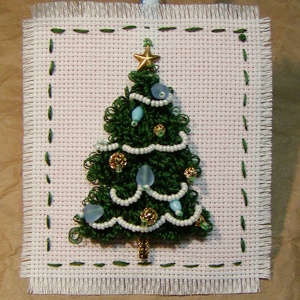
 This neat little project shows you how to make an ornament with a punch needle, and optionally mount it on a greeting card as a gift and card all in one. You can embellish it as much or as little as you like, so it’s something even a person with no sewing experience can do and look like a pro doing it! Use it as a gift tag, or as the gift itself! Customize it further by adding a personal message on the back.
Here’s what you’ll need to make the Ornament:
- 1 Punch Needle (the one pictured is made by Boye)
- Embroidery Thread
- Cross Stitch Fabric – 16 Count
- Sewing Needle (one with a big enough eye to fit 3 strands of embroidery thread)
- Embroidery Hoop
- Scissors
- Card Stock Paper
- Exacto Knife and Cutting Mat (or old cardboard – so when you cut slits in your paper you don’t cut through to your table.)
Optional for Embellishment and Completion:
- Beads, ribbons, premade flowers, or pre-made bows
- Sewing Thread to attach embellishments
- Decorative pen – or you can print a customized message with your printer
- Blank Greeting Card
- Clear Tape
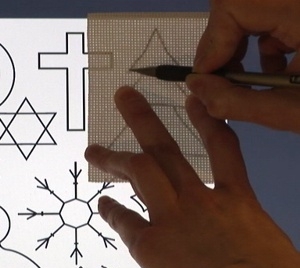
Choose Your Design
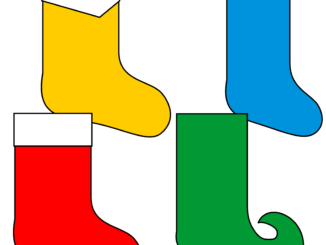
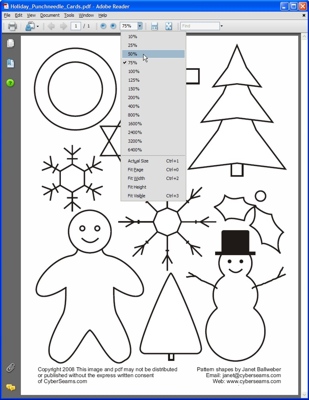
First you will want to decide on a shape for your design. We’ve got some holiday designs available for you here: Greeting Card Motifs to Get You Started
You can also come up with a design on your own. Just try to choose a shape with a simple outline.
Transfer the Design to Fabric
We’ve found that the easiest way to trace a digital design outline to your fabric is not to print it out. Instead, load the design on your computer screen and place the fabric on the screen. You can zoom in or out to make it bigger or smaller to fit your fabric shape. Keep in mind if this is to fit on a greeting card, you want to keep it at around 4 x 6 inches or less, but to be sure, measure your greeting card paper first and subtract about an inch from either side so you have some room to place your ornament on it.
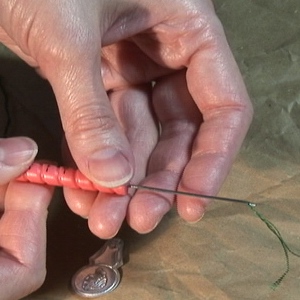
Load the Punch Needle
This particular Punch Needle comes in a set of three. You’ll be using the 1.26 mm needle – don’t use the largest needle in the set because it makes holes that are too big for the 16 count cross stitch fabric; you will end up gouging holes in your fabric and the embroidery thread would slip out. Cut about 24 inches of embroidery thread and separate it so you have just three strands. The full 6 strands will not fit through your needle. Thread the needle, making sure that the thread also goes through the little hole at the tip. Now set it to a number “2” setting. This will make a loop roughly 1/4″ high.
Begin Punching Your Design
You do not have to tie off your thread before you start. Simply begin “punching” into the fabric, using the holes in the embroidery fabric as a guide. Make sure that the slant in the tip of the needle leads in the direction you are punching in.

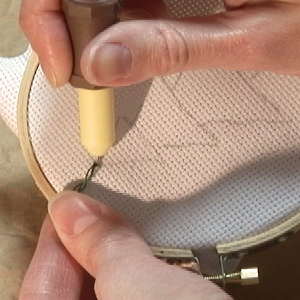
Fill in each row of holes within your design and work your way from one end to the other. When you run out of thread, if the thread is sticking out on the “right side” of your work, simply trim it so that it’s the same length as the loops. If it’s on the “wrong side” of your work, trim it (if needed) to about a half inch and leave it alone. Load your needle with more thread and continue with the design. When you are finished, do not yet trim the excess off your fabric. Also, keep it on the hoop until you’ve finished decorating it.
 Take care not to stab yourself with the punch needle!
Keep it away from your lap, fingers, and anything else that can be penetrated. The needle is very sharp!
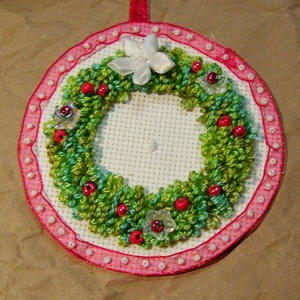
Embellish the Design
Use your imagination to decorate your design. Pretty much anything goes here. Sew some beads or bows onto the design with a matching thread. If you don’t want to sew, you can glue or stitch beads or glitter. If you use glue, we recommend one that is made to attach beads to fabric, such as Gem-Tac. Once you’re finished, you can remove the fabric from the embroidery hoop, but still do not trim it. Iron out any wrinkles caused by the hoop, carefully avoiding the needle punched design.
Attach the Backing
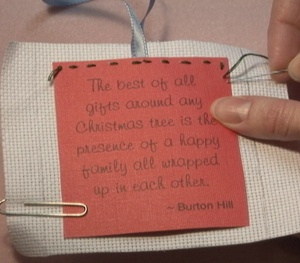
Using a measuring tape, measure the design area. Mark the card stock so you know where to cut. This is a good time to write any messages or sign the card as it will appear on the back of the ornament. If you print a message onto the paper with your printer, just make sure it will fit in your design area. Trim the card stock and match it up to your design, making sure any straight edges match up to the straight lines on the cross stitch fabric. Use paper clips to hold the fabric to the card stock. If you use pins, they will punch holes in the paper.
Thread your needle with embroidery thread and carefully stitch around the edge of the paper, using the lines of the fabric as a guide. Cut about 8 inches of ribbon and attach it as a loop at the top of the design, so the recipient can hang the ornament up. If you do not want to stitch it by hand, glue it (again, with a glue such as gem-tac), hot glue, or machine stitch it.
Trim the Ornament
Carefully trim the fabric around the ornament so that you have an even edge. You can make the edge fringed or cut it flush with the backing paper.
Check Out Our Punch Needle Tutorial Video!