 Ok, I know what you’re thinking. Why would I want to dye wool roving AND why would I do it with Kool Aid? Well, there’s several good reason for that, but let me back up and share a little bit about what you can actually do with wool roving first.
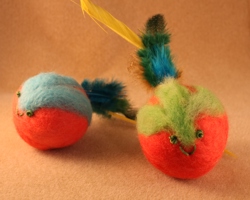
Wool Roving is wool that has been carded and in its final stage prior to being spun into yarn. Some people like to actually spin their own yarn. I enjoy making felted items with it. You can also use the roving in needle punched patterns. Of course you can purchase pre-dyed roving and I highly recommend this if you’re going for a specific color. However, the Kool Aid idea is pretty fun, especially if you have kids making a project with it. It costs almost nothing to do except for the cost of undyed roving and Kool-Aid and yields some bright colors.
Safety First: Before I go any further, I’d like to remind anyone that is not old enough to get into an “PG-13” rated movie by themselves to please have an adult with you as this project involves handling a pot of boiling water.
Choose Your Kool-Aid Colors
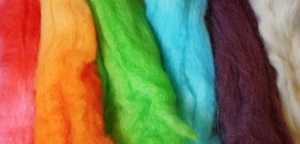
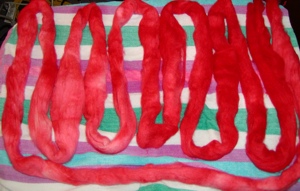
The picture accompanying this article is the actual roving I have dyed with Kool-Aid. As you can see, it yielded some bright colors. Feel free to experiment with all of them.
Boil the Water, Dye the Wool
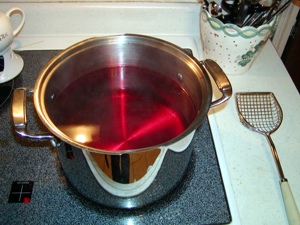 First, we’re going to bring a large pot of water to a boil. You might not want to let it get to a rolling boil however – the reason being that if the water is boiling rapidly, it might actually agitate the wool a little bit and begin to felt it. Your goal is just to get the water to boil-hot and then turn the fire off. So once it’s lightly boiling, add your packet of Kool-Aid and stir it in, making sure that it’s completely dissolved.
Then turn off the burner. Once you turn the heat off, add your wool to the pot. Let it sit there for 45 minutes to an hour.
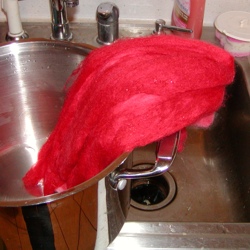
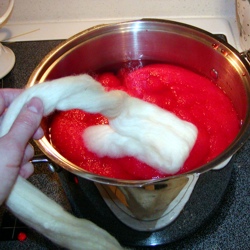 The wool will probably not dye totally evenly; however you can increase the chances of a more even tone by keeping all of the wool submerged in the dye bath. This means using two or three metal spatulas to weight the wool down under water. By the way, I did not do this with the red wool, and that is why it appears more blotchy colored than the others. If you’re going for a more tie-dyed look, then by all means let the wool float to the top. However if you want it to be a bit more even, you must weight it down so it is completely submerged in the dye bath.
Now there’s two things I want to mention at this point. One is that even though it’s been at least 45 minutes, the water can still burn you. Take great care when you pour it out, using a spatula or something to hold the wool back or a colander to drain it out; don’t touch it with your hands because you might burn them. You can leave it for a while to cool off, or if you’re in more of a hurry, rinse the wool off lightly with room temperature water but run water into the pot or colander that it’s in and then pour or drain that water out, using the spatula to wring out the excess.
Now you can take the wool out and roll it in a towel to soak up more of the excess water. Be sure not to agitate it to prevent felting. Hang up your roving or lay it out on a table to dry. At this point, it’s ready to be used!
 The other thing I want to mention is that when you dye wool with Kool-Aid, the wool will soak up all of the color, leaving you with clear water. Of course do not drink this water. Also, because you’re not using a dye with chemicals but instead with a beverage mix, it’s safe to use utensils and pots that you normally would cook with. Just be sure to wash your utensils well before using them for food purposes.
Spin It, Felt It, or Punch It
In summary, wool roving can be easily dyed with powdered Kool-Aid mix. Once you’ve finished dying your wool, you can use it for spinning, felting or with a punch needle. Good luck and have fun!