 I made this cat toy up on the fly as a gift idea to friends and family who have cats. This is a variation of the felted balls that we made last year. In this project however, I removed the ball from the center and stuffed it with catnip and polyfil. Check it out! This whole project took less than an hour to make, after the ball was felted.
Items you’ll need to make your felted catnip ball:
- Wool Roving (if you want colors, you can dye it or buy already dyed wool)
- Scissors – preferably small and sharp
- Smooth surfaced styrofoam balls – don’t get the rough textured ones unless you plan to leave the styrofoam in the center!
- Needle and Thread
- Stuffing – polyfil or foam chunks
- Nylon stocking
Optional:
- Catnip
- Contrast wool roving OR precut felt sheets
- Feathers
- Anything else you can think of to decorate the toy with – just remember that small pieces can fall off so try to avoid beads, sequins, or anything that might get swallowed by your kitty.
- Non-toxic glue like Aleene’s craft glue – I used hot glue, but I think non-toxic glue is a safer option in case your pet breaks the toy open
Safety note: Please use common sense here. If your pet rips the toy open, it’s time to throw the toy away!
Make A Felted Ball
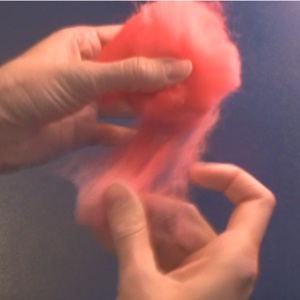
First we need to make a felt ball. Wrap your styrofoam ball with a layer of wool roving. Now wrap it some more, but lay the roving down in a different direction. Now add a third layer, again in another direction. Make sure you cover the entire ball with wool.
The reason that you want the wool strips to overlap in contrasting directions is because this helps the fibers grab each other in the felting process. Also the reason you want to use smooth styrofoam is because we’ll be removing the ball later and you can reuse it on something else. If you use the cheaper styrofoam balls with the rough edges, the felt will stick to it and may be extremely difficult to remove.
Stuff the ball (carefully!) into a nylon stocking and tie the end(s) off so it won’t fall out.
If you’re making a bunch of these at one time, you can chain them on one stocking without cutting it; just be sure to knot the nylon between balls so they don’t stick to each other! Now toss the ball(s) into the washing mashine with a little soap, hot water, and some towels to agitate the wool. When the cycle is complete, don’t put the ball into the dryer – just remove it and let it air dry. It will take a day or two to dry completely, depending on how thick the felt is.
Once the ball is dry, we can now get to work on creating the toy!
Stuffing the Toy Ball
Using your small sharp scissors, cut a slit into the ball. I cut an “x” shaped slit, but you can also just make a straight one.

The goal is to get the styrofoam ball out. Pop the ball out and you should still have a pretty well formed shape. Add some catnip (optional) and some stuffing to fill the ball back up. By the way, it might be easier to use a funnel to add the catnip. As you can see in the video, I didn’t use one and it went all over the place!
Now we need to stitch it closed. Using a needle and thread, close up the slits in the ball. I used a simple whip stitch to do this.
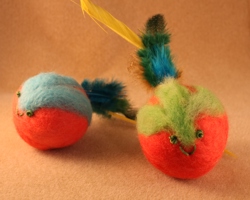
Giving Your Cat The Bird
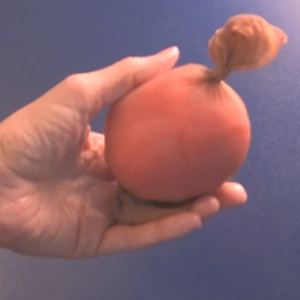
Now, I used red wool, so my stitched ball looked like a tomato that had just undergone major surgery. I decided to cover this up by turning my cat toy into a character.
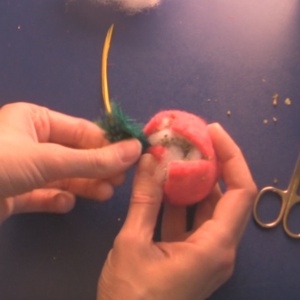
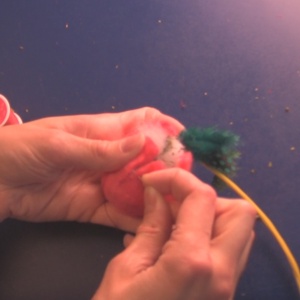
I added feathers to one end of the stitching. I used a hot glue gun to secure the feathers to the inside of the ball before stitching that part closed. In retrospect, it probably would be better to use a non-toxic glue for this part, like Elmer’s or Aleene’s craft glue. You can speed up the drying time with a hair dryer or heat gun.
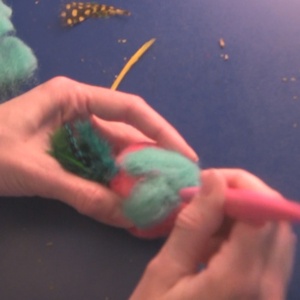
Then I used a needle felting tool to punch some contrasting wool into my wool ball. If you don’t have a needle felting tool, you can also simply cut shapes out of premade felt or use leftover yarn and sew or glue them onto the ball that way.
Use your creativity to make a unique toy! Finally I stitched some eyes and a beak to complete my felted bird.
Some other things you can do with this pattern, but leave the catnip out:
- Decorative birdies for display
- Christmas ornaments
- Easter decor
- Toys for small dogs (make sure you use plenty of wool as the thinner version will tear apart easier – and maybe leave the feathers off!)
- Potpourri holders
That’s all there is to it! Click below to activate the video tutorial of this project: