 Recently Ron asked us to do a tutorial for attaching a shirt collar. We agreed to use the same pattern he was using, and now can understand some of his confusion as the directions were not crystal clear. This collar tutorial is using Simplicity Pattern Number 4760 as a guide, but it’s generic enough to be used as technique for many dress shirts with a standard collar.
Assemble The Collar
First, have your front and back pieces sewn together at the seams. Pin fusible interfacing to the wrong side of one of the collar pieces. Be sure to clip the corners off and trim off about 3/8″ from the interfacing’s seam allowance. Follow the instructions that came with your interfacing to guide you on iron temperature. If you lost your instructions, try using a low heat setting and fusing for 10 seconds, let the fabric cool back down, and test to see if it fused properly. If not, fuse for another 10 seconds and check it again.
 Don’t move your iron around too much while you wait for interfacing to fuse. It pushes the glue around. Instead, pick the iron up off the fabric, then move it, and place it back down to get a good fuse.
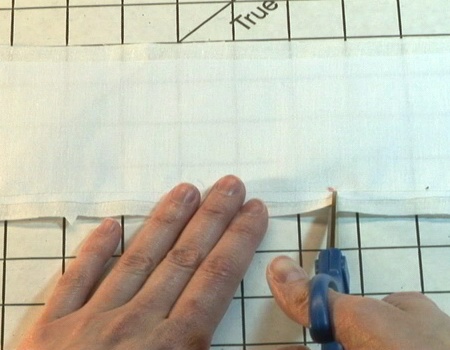
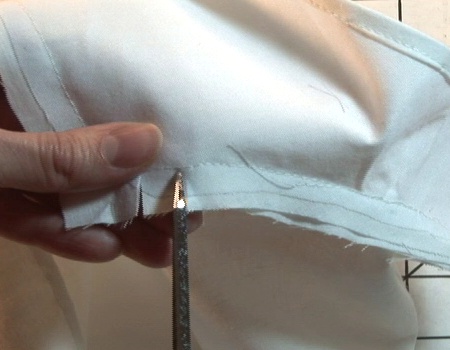
Stitch along the notched edge 5/8″ from the edge – the line this creates is meant as a guide and also for reinforcement. Clip the notched edge of the collar to the stitching line at the small dots, and press under the seam allowance: 5/8″ or 1.5 cm.
Baste The Collar To The Shirt
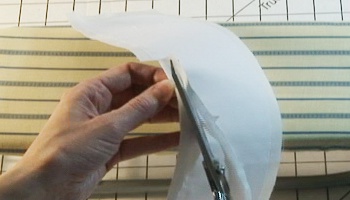
Now, sew the facing/collar to the other matching collar piece, keeping the right sides together. Be sure to leave the notched area open. This part of the pattern’s original instructions is not very clear! Only sew the outer edges together that don’t have any notches/markings. Clip the corners close to the stitching, turn the collar right side out and press.
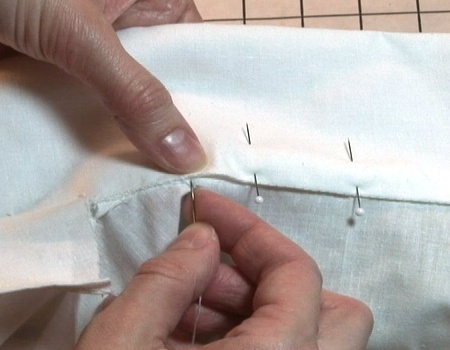
Now pin the collar to the outer side of the garment front/back. The side of the collar that was not turned under should be the side pinned to the garment. Baste the collar to the garment.
Prepare Shirt Facings
Having cut the shirt facings and interfacing out already, trim your interfacing down by 3/8″ around all sides. Fuse the interfacing to the wrong side of the shirt facings. Finish off the un-notched edge. You can do this in several ways: Serge the edges, zig-zag stitch along the edges, or turn under 1/4″ and stitch flat.
With the right sides together, pin and baste the facings to the garment along the front and neck edges. Clip the seam allowance of the neck edge at the small dot – to give ease at the seam line area. Now sew along the front and neck edge as basted, making sure not to sew along the turned-under area of the collar.
Trim your seams, clip the corners and curves.
Turn the facing to the inside and press the garment flat. Now we need to close the collar. The best way to do this is by hand, because you can hide the stitches easier, but you can sew it by machine if needed. Pin down that edge of the collar between the dots that was turned under earlier. Sew along the edge with a whip stitch.
Press the collar. Optionally, you can topstitch around the outer edge. The example pictured here has a topstitch 1/4″ from the edge.

You’re done! Enjoy your new collar!
Here is a video demonstrating the process: