Recommendations For Beginners:
Before we get started, let’s quickly cover a few recommendations for new knitters.
Knitting Needles
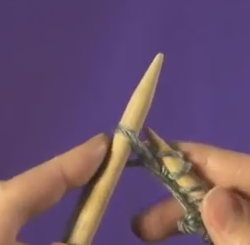
It is the recommendation of this author that a beginner to knitting choose needles that do not slide all over the place. I recommend purchasing a pair of bamboo needles (as shown in the video tutorials below) because they "grip" the yarn far better than metal needles. Or, you can purchase a pair of plastic needles and "rough them up" with a fine grain sand paper. Of course, you can still use metal needles, but just be aware that they may be a little bit slippery. We’ve tested a range of needles, and in our opinion, the more expensive ones do not knit any differently than the cheaper ones (keeping in mind the slippery factor.) It is still up to the person doing the knitting and their technique. That being said, if using a $40 (US) pair of needles makes you feel good about what you are doing, then go for it! You can still get great results with needles that cost less than $10.
Yarn
Any yarn will probably work to start with. I recommend, however, getting a basic 3 or 4 ply yarn without any special embellishments. For example, learning to knit with an "eyelash" yarn, or something that is extremely fuzzy or has embellishments hanging off of it might confuse you if you accidentally lose your place or drop a stitch. So for this purpose, try to stick to a simple worsted weight yarn until you feel comfortable with what you’re doing. Also keep in mind the yarn content. Some wool yarns shrink when washed, so if you plan to make, for example, a sweater or blanket for a pet, you will probably want to use something that is machine washable. If you are learning to felt* projects, you will need to use a wool that will shrink. Not all of them do so be sure to ask someone to help you when choosing wools for felting, or read the labels. Some wool yarns are labeled for felting specifically (e.g. Caron’s Felt-It – which when left unfelted also creates wonderfully soft projects.)
* Felting: A process where material (often wool) is knitted and then washed in hot water to induce matting and shrinkage of the fiber. This creates "felt" and is prized for its dense and durable qualities.
Note to Left Handers:
If you are left handed, you might prefer to reverse the hands if you find that the "right hand" instructions below are too difficult. That is, where knit with the right hand needle below, you would instead use the left one.
Casting On
First, you’re going to start with a slip knot. Do not cut your end piece short. Make sure you leave enough slack after the knot so that you can cast on more stitches. The loop should be connected to the yarn ball. Cast on the first row by slipping the end piece around your left thumb. Slide it onto the knitting needle. Loop the yarn from the yarn ball around the needle with your right hand, and loop the left hand’s loop over the right hand’s loop to complete the stitch. Continue casting on as many stitches as you need for your project.
Knitting the First Row – The Knit Stitch
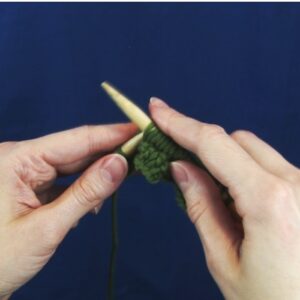
When you complete casting on your first stitches, take the needle with the cast-on stitches in your left hand and the empty needle into your right. You will slide the empty (right) needle into the first loop on the left, from the bottom moving up through the loop, positioning the empty (right) needle behind the left needle. Loop yarn from the yarn ball around the right needle from back to front, passing it between the two needles. Keep the loose yarn to the back. Slide the right needle down through the left needle’s loop and slide that loop off of the left needle. This will create a new loop on the right needle. Repeat this for each loop on the left needle, creating new loops on the right needle. This will create the first row.
Click below to view the video.
Knitting the Second Row
Once you complete the first row, you will then transfer the right needle, which is now full of stitches, to the left hand, and the left needle, which is now empty, to the right hand to begin the process all over again. Repeat the above instructions for this row. Using the knit stitch on all of these rows creates what is called the Garter Stitch.
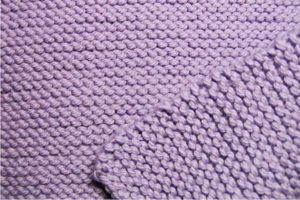
The Purl Stitch
The purl stitch is really the reverse to the garter stitch. You would get the same result by knitting a garter stitch left handed. Instead, we call this a purl stitch and knit it (right handed) by looping the right needle in the front rather than in the back. Here we go:
To purl, you will push the tip of your right needle through the top loop on the left, keeping the right needle in front of the left needle as you pass it through the loop. In the garter stitch, you are pushing the right needle behind the left needle. Again, to purl, you will push the needle in front of the left needle through the loop. Keep the yarn in the front. Loop the yarn from around the tip of the right needle, front to back. Repeat this step for the rest of the row.
Basic Stitch Combinations
You can form many different stitch variations and designs simply by combining these two basic stitches together in various ways.
The Stockinette Stitch
Knitting a row of garter stitches, then purl a row, then a row of garter stitches, then purl a row (and repeating this) is called the stockinette stitch.
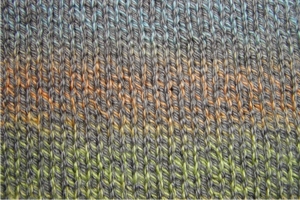
Rib Knit
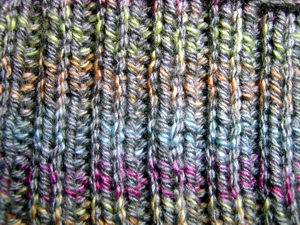
Rib knit is created by a combination of knit, purl, knit, purl in the same row. For example, Knit 3, Purl 3, Knit 3, Purl 3. When you go to form the second row, you would reverse this process: Purl 3, Knit 3, Purl 3, Knit 3. On the third row, you would repeat the first step: Knit 3, Purl 3, Knit 3, Purl 3.
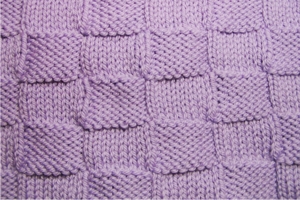
There’s countless combinations with knit/purl stitches. You can knit 2, purl 5, knit 2 and when you flip to the next row, purl 2, knit 5, purl 2 – this will give a striped effect. You can also alternate these patterns to create a checkerboard design.
How To Add a New Skein of Yarn
At some point, assuming you’re working on larger projects, you’re going to run out of yarn. You’re going to want to add another skein of yarn so you can keep going. You can do this by simply tying a square knot with the two ends, and then weave the ends in.
How To Weave in the Ends of Yarn
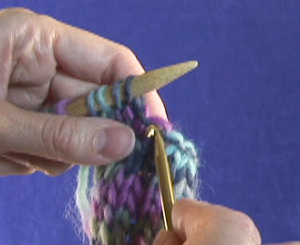
Using a crochet needle or yarn needle, the idea is to weave the loose yarn ends into the knitted fabric. This creates a finished look. The video below demonstrates one way to do this:
How to Increase Stitches
The easiest way to increase stitches is, between stitches you’re going to "yarn over". Then simply continue to stitch. Click below to view a quick demonstration:
This concludes The Basics Of Knitting.

