 Grommets (sometimes also called eyelets – but there is a difference) are one of those things that seem to really separate homemade garments and bags from store bought ones. They’re incredibly useful for utility-type items (bags, curtains, tarps) and can range from making something look more sturdy to more elegant. There’s also been a more recent trend in using eyelets with scrapbooking projects. The look might seem hard to accomplish, but it really isn’t. And you don’t have to purchase expensive equipment in order to attach them to your project.
To be clear though, grommets have two sides, a front and back piece, or a “male” and “female” piece. Eyelets are made of one piece of metal that, when attached, curls back onto itself while grabbing the fabric that it’s attached to.
I have been attaching grommets for the better part of the last decade and only last year purchased a eyelet punch, which looks like a hole punch but the tip of it is made to curl the ends of the metal eyelet around the fabric. Before that, I used the hammer-on grommets. As long as you have a hammer and a hard surface to hammer against, this works just as well.
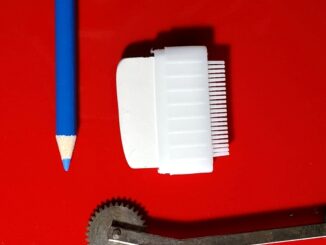
 For the hammer-on method, simply buy a pack of grommets at your local fabric or craft store – they often come with the necessary tool (see the image below) to use for the attachment. You’ll need a hammer, however. I highly recommend using interfacing under the fabric in the area where you will be attaching any grommets or eyelets. The extra reinforcement will help support the fabric. Mark the location where you want to attach it. Cut an x-shaped slit over the area with a pair of sharp scissors – you don’t want to exceed the area where the grommet will be hammered on, just enough to let the fabric “give” when it is hammered, so it doesn’t pull on the fabric around the grommet. Making sure you are working over a hard surface (such as a concrete floor or work desk,) place the metal disc tool on the underside of the fabric where the grommet will be hammered on. Put the bottom piece of the grommet on the disc. Put your fabric over the bottom grommet and center it where it will be hammered on. Set the upper piece – it usually has a longer shank on it compared to the bottom piece – on top of that area and put the long tool on top of the upper eyelet. Try to hold it in place and not let it move around. Now strike the long tool with a mallet. Keep striking it until the grommet is set.
 A mallet is best to use instead of a hammer because it will distribute the weight/force of the hammer a little better. Using a rubber pad or cutting mat under your work will protect the grommet on the underside from damage when you hammer it in.
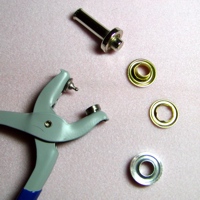
A Note About Eyelet Pliers vs. Grommet Tools
Eyelet pliers are great, but the kind pictured here do not attach the larger heavy duty grommets. Because eyelets are one piece of metal folded back onto itself, they also leave a slightly rough edge on the underside; so be aware of this fact if you’re making a garment with it, as it could grab or scratch anything facing the underside of the fabric. However, if you don’t need a larger eyelet for your project, then the punch tool might be worth your time and money. As with the larger grommet, you’ll mark the location where you want the eyelet. Cut a small x-shaped slit where the eyelet will be installed, or alternatively, use an awl. The best kind of awl for fabric can usually be found at a fabric store, but if you can’t locate one of those, hardware stores also sell them. Place an eyelet on the pliers, hold the tip over your fabric, and squeeze it just as you would with a hand held hole punch. Voila! Your eyelet is attached.
To view a video of an eyelet punch in use, click on the image below: