 I really enjoyed making this project. There have been so many times where I wanted to make a custom card but just didn’t know where to start. With this project, you have a starting point. All you need to complete the project is some ribbon – preferably a thinner ribbon because the thick stuff will tear large holes in your paper – optional thread, some heavy card stock paper, glue, and a printer to print out the base pattern.
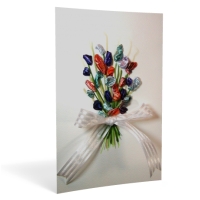
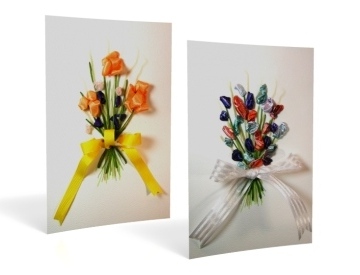
This greeting card design is great for wedding gift cards, a birthday card, baby showers, and Mothers Day. It includes a printed background graphic, and then you can embellish it in any way you wish. Below I will include some instructions for a mutli-colored flower bouquet design. Here are some other designs to help inspire your own card:
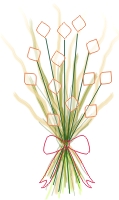
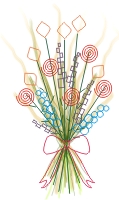
First, we start with a graphic. There is a link at the bottom of this article where you can download the background pattern for this project. Or, you can paint your own design onto your card, using this image as a starting point.
Next, (and this step is optional) add some additional “stems” to the design with embroidery thread. You can skip this if you don’t have any thread, but it gives a nice 3D look. After this, I added “flowers” to the bouquet. I used a spool of knitting ribbon that came in a variegated color pattern. You can use regular ribbon or multiple pieces of ribbon, or just a single color. Just remember to keep the ribbon thin; you’ll want something that isn’t stiff or thick as it will tear large holes in your card.
To add the flowers, simply make straight stitches in random places. You do not need to knot the ribbon on the back side. Also leave the ribbon loose on the front; the “bubble” effect will give it dimension. Add as many flowers and colors as you like. Flip the card over to the back – it’s probably looking a bit messy back there, but this is ok! Trim any loose ends down to a half inch or so, and if you wish, glue them down with hot glue. You can use a slow-dry glue like Elmers, but I liked the hot glue because it didn’t have a chance to bleed over to the front of the paper. I then cut a 5″ x 7″ piece of contrasting paper and glued that over the back of the design to hide all the loose ends.
To download the background image for this project, right mouse click on the link below and “Save Target As” to your computer:
 Free Greeting Card Background (PDF)
Here is a video tutorial for this pattern:

