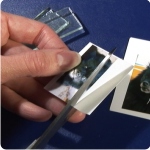
 First, clean off both sides of the glass piece to remove any residue left on it from handling. You can use vinegar, rubbing alcohol, or soapy water – but we highly recommend vinegar because it cuts the oils and leaves no residue. If you wash with soap and water, make sure you rinse the glass well.
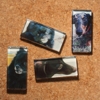
Make sure you have a photo sized and printed to fit your glass.
I need to make a side note here and mention that the photos in this tutorial were printed by a professional photo printer (I used mpix). I later tried printing my own at home on inkjet photo paper, and the ink smeared pretty badly! So if you print your own photos, do a test piece first before making a whole batch of them, to be sure the ink doesn’t bleed into the glue.
Cut an image of your choice to fit the back of the glass.
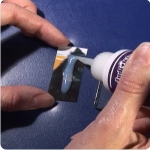
I recommend using Diamond Glaze to adhere your image to the glass.
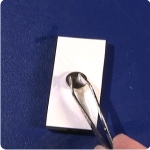
Apply Diamond Glaze adhesive over the top of your image – just a small amount. Apply the image to the bottom of the glass and work out any air bubbles.
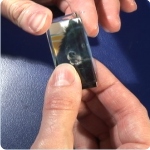
Allow the glue to dry and coat the back of the image with more Diamond Glaze. This will waterproof the image.
Let the glue dry completely.
Attach a magnet to the back using a super glue like E6000 – make sure it’s small enough so that it’s not visible from the front. Keep in mind that Earth magnets (also known as Neodymium magnets or NIB magnets) are stronger than regular craft magnets.)
Now you’re finished! Keep in mind that Earth magnets (also known as Neodymium magnets or NIB magnets) are stronger than regular craft magnets and are better at holding objects to magnetic surfaces. For this reason, keep your magnets away from any computers, cassettes or other objects that can be damaged by magnets.
Check out our magnet tutorial below!