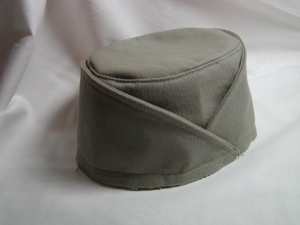
Instructions for constructing an Imperial Officer Hat.
(Scroll to the bottom if you want to download the pattern and instructions.)
 It is highly recommended that you press your seams flat between steps. This will ensure the most polished, completed look.
(Scroll to the bottom if you want to download the pattern and instructions.)
You will have the following amounts of pieces cut out:
Piece checklist:

Fabric:
____ 4 Flap
____ 2 Crown
____ 2 Visor
____ 1 Top
Lining Fabric:
____ 2 Crown
____ 1 Top
Interfacing:
____ 2 Flap
____ 2 Crown
____ 1 Visor
____ 1 Top
Heavyweight Stabilizer:
____ 1 Visor
Instructions:
It is highly recommended that you press your seams flat between steps. This will ensure the most polished, completed look.
Prep with Interfacing
Before you sew your pieces together attach the Interfacing…
If you are using fusible interfacing, trim the seam allowance off of the edges and fuse to corresponding FABRIC pieces on WRONG side.
If you are using sew-in interfacing, sew interfacing to corresponding FABRIC pieces on WRONG side, and trim 1/4" of Interfacing edge.

1. Sew a line along Visor STABILIZER 3/4" from outer edge.

2. If you are using sew-in interfacing, sew interfacing to corresponding FABRIC pieces on WRONG side, and trim 1/4″ of Interfacing edge.
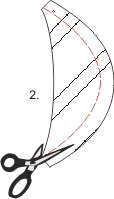
3. Sew a line along Visor outer edge STABILIZER 3/4″ from edge.
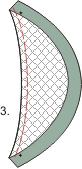
4. Cut along the seam line to remove seam allowance from STABILIZER.
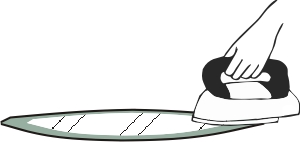
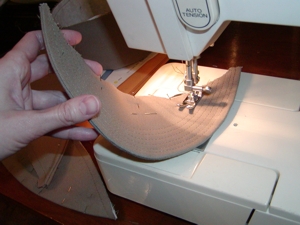
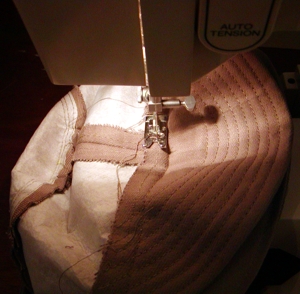
It helps to hold the visor in a curve when topstitching (shown) to prevent puckering. You can also iron the visor on a tailor’s ham to reinforce the final shape.6. Pin and sew Crown fabric pieces together at sides, matching notches.
7. Repeat step 6 for Crown Lining.
8. Notch upper edge of Crown with your scissors – but do not cut past the seam allowance.
9. Pin hat Top to Crown, matching circles on Top to seam lines on Crown at the front and back of the hat.
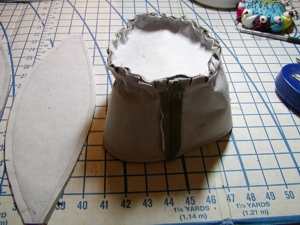
10. Topstich through seam allowance and fabric 1/8″ from edge along the top of Crown. This will help to stabilize the hat and give a more polished look.
11. Repeat Steps 8 – 10 for Hat Lining.
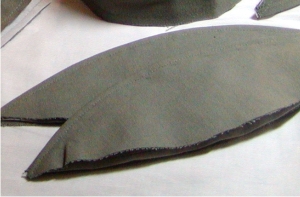
12. Pin and sew Flap pieces, WRONG sides together along notched edge.
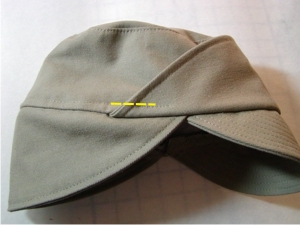
13. Turn flap out, press, and top stitch 1/4″ from top edge.
14. Baste flap opening closed.
15. Pin and sew Flap to Crown in the front, matching Flap center to Crown seam line.
16. Repeat Step 15, but this time attach the 2nd Flap to the back of the hat. The back flap will overlap the front flap a little bit on the sides.
17. Sew along bottom edge of hat at the 5/8″ seam allowance.
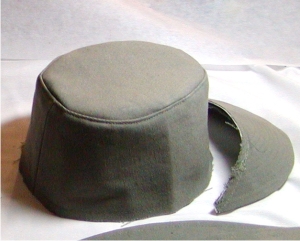
18. Sew Visor to the front, matching center circles to crown seams.
 The visor will be very stiff – take care not to stick your fingers with the pins!
Another option is to pin only the CENTER of the visor down to the hat Crown, and stitch from the center out. This will create two seam lines – one from the center to the right and one from center to left. This will help prevent shifting and puckering of the Visor when attaching it to the Crown.
19. Turn Flaps down and stitch along bottom edge of Crown 1/4″. This seam will NOT be visible when the hat is completed.
20. Turn Flaps back up over Hat Crown.
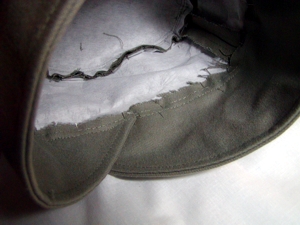
21. Press the lining edge under 5/8″.
22. Pin Lining into hat, matching Crown seam lines.
23. Handstitch the lining into the hat along bottom edge.
24. Turn back Flap down. Tack the front Flap down with a small stitch to prevent bulk.

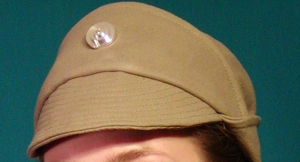
25. Attach the Greeblie to the front flap. Your hat is finished!
Click here to download the full pdf pattern and instructions. – File Size – 2.2MB